
I was about the cut out the doorways in each panel before assembly when I realised that I had no idea how the actual door frames would sit and how much space they would take up on each side. I had done two doors as a test so that was more or less sorted out in my head.
I then mocked up an opening and made it as deep as the walls would be by adding scraps of card until the thickness was right. I then made up two doors from foam board for the opening as the two downstairs main rooms have double doors leading off the hallway.
The two following photos were my inspiration. The top one for the surround and the second one for the paneling. They are both English Georgian style.


Here I pinned in place some card and foam board to get an initial idea.

I wrestled with openings, to the inside or outwards, a lot depended on this. I finally decided to open inwards and set the doors on the room side of the opening and not the hall side. This determined hinges.
I used the same technique as the two doors I had already made with a fine mdf core layered with 350g kraft card.

As there are two pairs of doors and knowing how much I hate repetition after the fact, I decided to make the four doors at once.

Below you can see that I had just 'filled' in the edges of the doors to mask the multiple layers of card and wood.


I made the doors 10 cms wide as a pair and as the opening I initially cut out was 11 cms that gave me 10mm for side trims. I knew that at this stage I could still adjust the openings and this was the whole point of making the doors now as opposed to later when it would be a lot harder to trim the openings.

I gave the doors multiple coats of mat acrylic house paint with lots of fine grit sanding in between each coat. I am still not sure of the final colour scheme but they still needed a good base.

Two pairs of side trim and two top trims made in the same way as the doors.

Above and below the doors with the edge trims made the same way as the doors but with a mat board base instead of wood. At a later stage I had to add a wood backing to take the hinges and for this I used 'blind' wood. The door handles came from JULIE via Etsy.

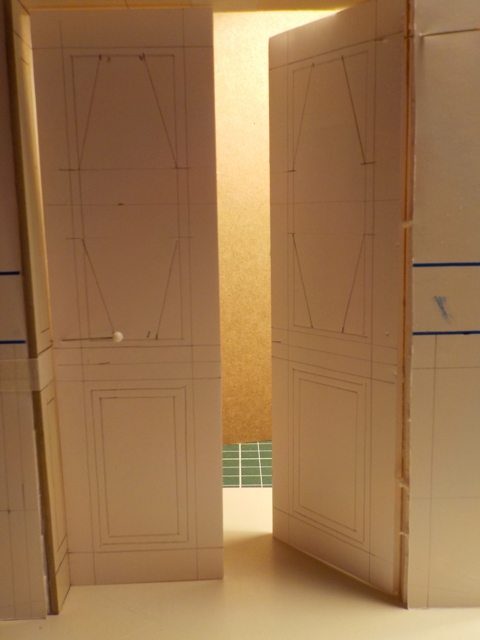
Here you can compare the doors with the first door I made. The ground floor rooms have high ceilings so I wanted to make a statement with the doors giving them the right scale in height.

For the surround I glued some wood trim ( blind wood, balsa and fine obeche ) onto fine card to make assemble easier and keep it all stable. The card could easily be cut away later. The top trim came from a dollhouse kit unused and the middle section is a half dowel cut with my new desk saw!

First coat of paint, I followed with four more and sanded each one well.

I then assembled the frame with the edge trim using wood glue followed by kraft framing tape around the join to maintain a solid hold.

Glueing in the hinges, I hate using hinges, so tricky ! I used two part époxy quick drying glue and some tape to hold in place until setting.

Here you can see the card cut away and the side panels in place. For an assembly of card I think it looks ok. I used to be such a snob in the beginning thinking that everything had to be genuine, real wood to scale, real ceramic tiles and glass windows and mirrors. NOW I know better, that its all illusion, just as life itself is illusion.

The door frame against the scale drawing. The hinges are still missing their screws or nails and have yet to be set into the frame. I now have enough information to proceed with the other door openings. Each ceiling height is in a different scale, smaller as you ascend. 30 cms for the ground floor, then 25 and then 22. The top floor has a slanted 'mansard' ceiling opening up more possibilites for design.

Here is the glue I use, you must all know it but its good and solid and quick. I have used other époxy glues but they were too slow drying.

Just fabulous!
ReplyDeleteThanks Jodi, I am actually pleased with myself at making two of the same thing as usually I hate that and get bored ! but I worked to the end and its Something else DONE !! Now I'm working on the two smaller doors for the back of the hall as each have different problems to solve. Huggs ,,,,
DeleteHello Stephany,
ReplyDeleteThe doors and doorcase look terrific. I really love the paneling you created.
Big hug
Giac
Hi Giac, I DID get the idea from your blog ! and am pleased that I can in fact make my own doors as all the ones I se for sale seem so standard and not very intersting. I can now make my door frames and surrounds and then make the doors but of course they have to be 'hinged in' before installing ! bug hig ( or big hug !) xoxoxo
DeleteThis comment has been removed by the author.
ReplyDelete